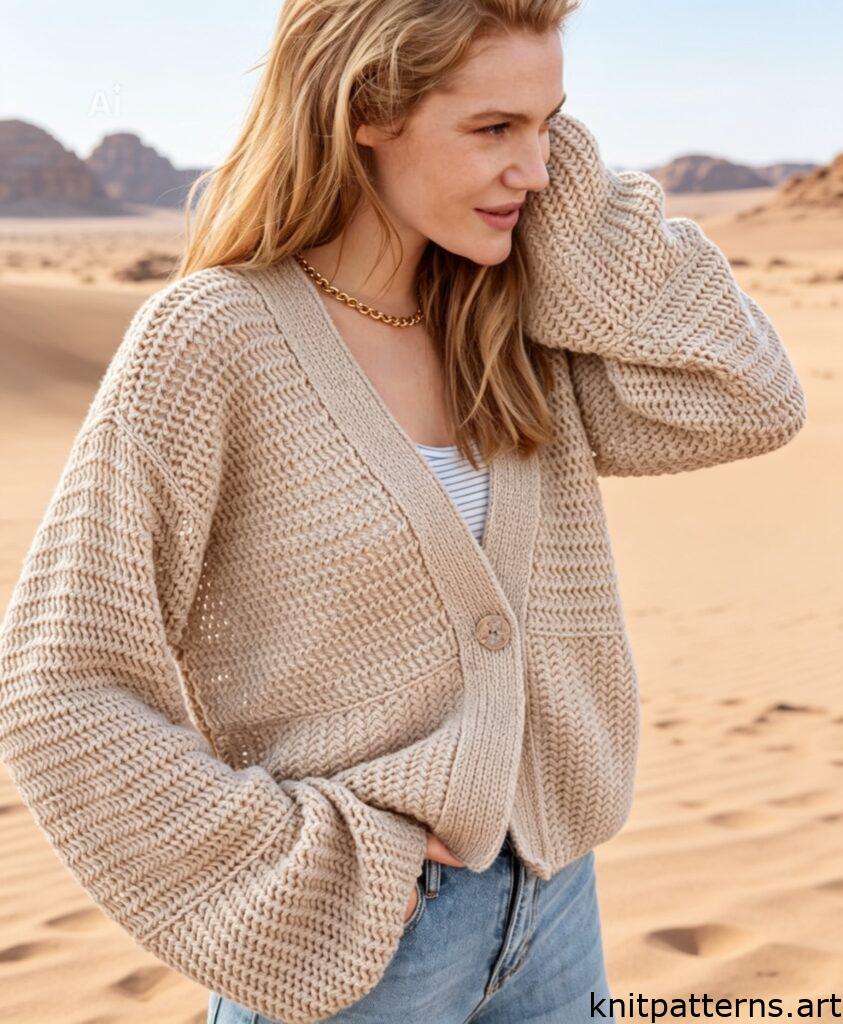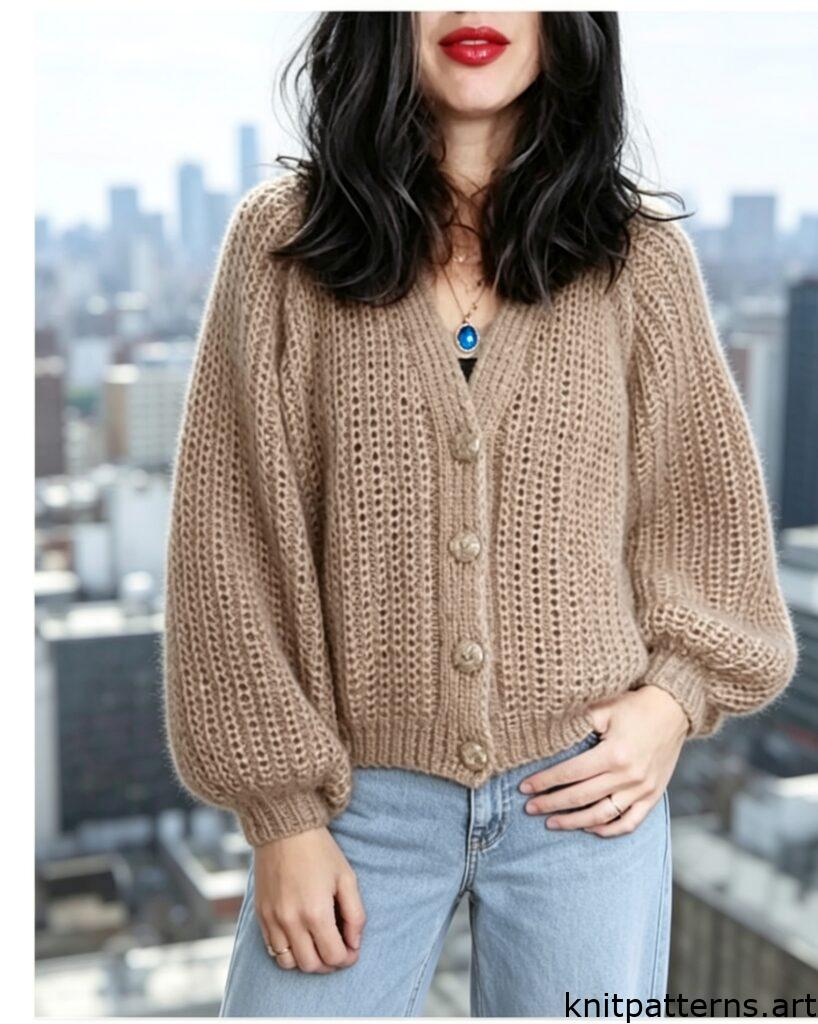
Looking for a cropped cardigan knitting pattern free of complicated constructions, yet stylish and airy? This lace button-down cardigan is exactly what you need. Designed to be knitted flat in pieces and seamed, it features a delicate lace repeat, garter stitch button bands, and buttons down the front. The cropped length hits perfectly above the hips, making it a great layering piece for spring and summer. Whether you search for a free cropped cardigan pattern, a lace cardigan knit flat, or a button down cardigan knitting tutorial, this pattern delivers clear instructions. Plus, it includes fully fashioned shaping and a neat selvage edge throughout.
✅ This is a free cropped cardigan knitting pattern – no tricks, just lace and buttons.
Sizes: S/M (L/XL – XXL)
Data for size 40/42 and 44/46 are given in parentheses and separated by a hyphen.
If only one number is given, it applies to all sizes.
🧶 YARN & MATERIALS
- Yarn: 450 (500 – 550) g of mint green yarn
– 73% cotton, 27% polyamide
– 150 m / 50 g (approx. 164 yds / 1.76 oz) - Straight needles: US size 2.5 (3 mm) and US size 6 (4 mm)
- One long circular needle: US size 2.5 (3 mm), 120 cm (47″ long)
- 5 buttons: light gray, 15 mm diameter (approx. ⅝″)
PATTERNS & TECHNIQUES
Selvage Edge (Knot Stitch Edge)
Knit the first and last stitch of every row.
Important: All pieces are worked with a selvage edge!
Garter Stitch (for button bands and hem)
Knit all stitches on both right side and wrong side rows.
Lace Pattern (multiple of 10 + 5 + 2 selvage stitches)
Worked in flat rows according to the chart.
- The chart shows only right side rows (read from right to left).
- On wrong side rows: work stitches as they appear (knit over knit, purl over purl), and purl the yarn overs.
- In width: after the selvage stitch, repeat the 10‑st repeat as many times as needed, then work 6 stitches after the repeat (as described for each piece), then the selvage stitch.
- In height: repeat rows 1–12 continuously.
FULLY FASHIONED DECREASES (for neck and shoulder shaping)
From the right edge (RS row):
Selvage stitch, then slip 1 as if to knit, knit 1, pass slipped stitch over (SSK – left‑leaning decrease).
From the left edge (RS row):
Work to last 3 stitches, knit 2 together (K2tog – right‑leaning decrease), selvage stitch.
FULLY FASHIONED INCREASES
From the right edge (RS row):
Selvage stitch, then increase 1 stitch (see below).
From the left edge (RS row):
Work to last stitch, increase 1 stitch, selvage stitch.
How to increase 1 stitch:
Knit 1 twisted through the horizontal strand between stitches (M1L or M1R – make one left/right).
Special Decreases:
- SSK (Slip, Slip, Knit): Slip 1 as if to knit, slip the next as if to knit, insert left needle and knit them together – left‑leaning.
- K2tog: Knit 2 together – right‑leaning.
- 3‑stitch left‑leaning decrease: Slip 1 as if to knit, knit next 2 together, pass slipped stitch over.
GAUGE (TENSION)
22 stitches and 32 rows = 4″ x 4″ (10 cm x 10 cm) in lace pattern on US size 6 (4 mm) needles.
⚠️ Always swatch!
BODY OF THE SWEATER
Back Panel
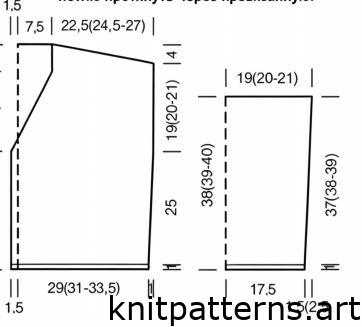
With smaller needles (US 2.5 / 3 mm), cast on 120 (130 – 140) sts.
Work in garter stitch, starting with a wrong side row.
After 1 cm (approx. ⅜″) = 5 rows from cast‑on edge, increase 7 sts evenly across the last row → 127 (137 – 147) sts.
Switch to larger needles (US 6 / 4 mm) and continue in lace pattern as follows:
Selvage st, work 10‑st repeat 12 (13 – 14) times, then work 6 sts after repeat, selvage st.
Side shaping:
In the 19th row from the start of the lace, increase 1 st on each side (fully fashioned increase).
Repeat these increases 2 more times every 20th row.
Needle → 133 (143 – 153) sts.
Armholes:
At 26 cm (approx. 10¼″) = 84 rows from cast‑on edge, place a marker on both sides (marks the start of armholes).
Shoulder shaping:
After 19 (20 – 21) cm = 60 (64 – 68) rows from marker, bind off for shoulder slopes on both sides:
First bind off 8 (7 – 6) sts, then bind off 6 more times every 2nd row, 7 (8 – 9) sts each time.
Neck:
At the same time as the last shoulder decreases, bind off the remaining 33 neck sts on the following RS row.
Left Front Panel
With smaller needles (US 2.5 / 3 mm), cast on 61 (66 – 71) sts.
Garter stitch for 5 rows, starting with WS row.
On last row, increase 6 sts evenly → 67 (72 – 77) sts.
Switch to larger needles (US 6 / 4 mm) – lace pattern:
Selvage st, work 10‑st repeat 6 (7 – 7) times, then 6 sts after repeat, selvage st.
Side shaping (right edge):
In 19th row of lace, increase 1 st (fully fashioned).
Repeat 2 more times every 20th row → 70 (75 – 80) sts.
Armhole (right edge):
At 26 cm = 83 rows from cast‑on, place marker at right edge.
Neck shaping (left edge):
At the same time as the armhole begins, start decreasing for neckline:
Alternate between every 2nd and 4th row (2nd, 4th, 2nd, 4th…) a total of 19 times – each time work 1 fully fashioned decrease (SSK or K2tog).
First decrease happens immediately, then alternate.
Shoulder slope (right edge):
After 19 (20 – 21) cm = 60 (64 – 68) rows from marker, work shoulder slope same as back.
After all decreases: 50 (55 – 60) sts remain before shoulder bind‑offs.
Right Front Panel
Work symmetrically to left front panel.
Lace distribution for right front:
Selvage st, start with first 5 (0 – 5) sts after the repeat (see chart), then work 10‑st repeat 6 (7 – 7) times, finish with selvage st.
SLEEVES (make two)
With smaller needles (US 2.5 / 3 mm), cast on 72 sts.
Garter stitch for 5 rows, starting with WS row.
On last row, increase 5 sts evenly → 77 sts.
Switch to larger needles (US 6 / 4 mm) – lace pattern:
Selvage st, 10‑st repeat 7 times, 6 sts after repeat, selvage st.
Sleeve shaping:
In row 23 (17 – 13) of lace, increase 1 st on each side (fully fashioned).
Repeat 3 (5 – 7) more times every 24th (18th – 14th) row.
Needle → 85 (89 – 93) sts.
After 37 (38 – 39) cm = 118 (122 – 126) rows from garter band, bind off all sts in one row.
FINISHING & ASSEMBLY
Pin pieces to measurements, mist with water, and let dry completely.
Sew shoulder seams.
Button band + neckband (knitted sideways):
With circular needle (US 2.5 / 3 mm), pick up stitches evenly along front edges and neckline:
- Straight edge of right front (bottom → start of neck slope): 64 sts
- Sloped edge of right front (to shoulder seam): 51 (53 – 55) sts
- Back neck edge: 35 sts
- Left front sloped + straight edge: same as right
Total on needle: 265 (269 – 273) sts.
Work back and forth in garter stitch.
Buttonholes on right front band (2nd row):
K6, K2tog, yo, K6 – repeat from * to * 3 more times → total 5 buttonholes.
At 5 rows total height, bind off all stitches.
Final steps:
- Sew sleeves into armholes
- Sew side seams and sleeve seams
- Attach 5 buttons to left front band opposite buttonholes
- Weave in all ends
Now you have a complete cropped cardigan knitting pattern free to download and save. This lace cardigan with buttons is perfect for intermediate knitters who love clean edges and a modern silhouette. Whether you call it an eyelet cardigan, a summer crop top cardi, or simply your next weekend project – this free cropped cardigan knitting pattern will not disappoint.
🔁 Bookmark this free cropped cardigan knitting pattern – your lace button-down cardigan is waiting to be cast on.
Knitting Chart
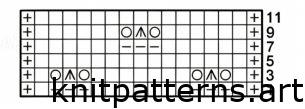
Symbol Key
+ edge stitch
⬜ knit stitch (k)
━ purl stitch (p)
○ yarn over (yo)
ᗑ Slip 1, k2tog, psso (Slip 1 as if to knit, knit the next 2 stitches together, then pass the slipped stitch over the knitted-together stitch)